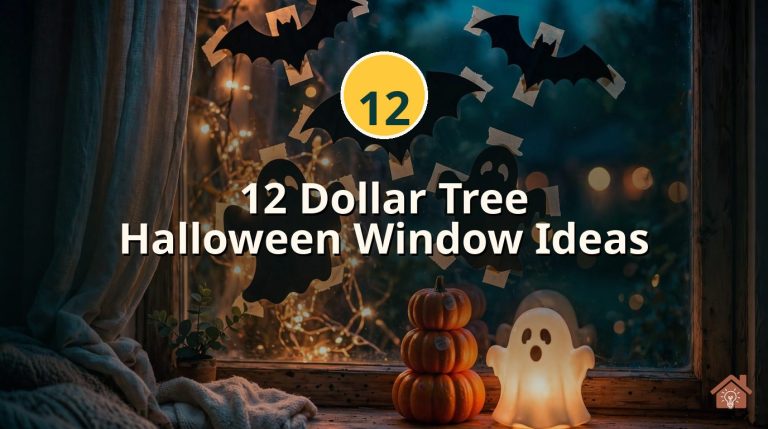
Your lease says no nails, no paint, no damage — but it says nothing about Halloween. Good news: your windows are the one spot where renters can go all out.
Glass is the perfect renter canvas. Almost everything sticks to it for the season and peels off clean in November. No holes, no lost deposit, no awkward chat with your landlord.
These 18 ideas were picked for apartments and dorms: no yard needed, no tools, no damage. Most cost under $10 or use stuff you already own. For more renter-friendly hanging tricks, that guide pairs well with this list.
Pick one window to start — your living room or bedroom — and work through the ideas below. By tonight, your place can look properly spooky.
Best for renters: static-cling decals and DIY glue clings — zero adhesive, and they peel off clean in seconds.
✓ Work from inside the glass so rain and wind never touch your decor.
✓ Test any marker, paint, or cling on a small corner of glass first.
✓ Skip anything that needs nails, screws, or drilling — every idea below is 100% deposit-safe.
Table of Contents
- 1. DIY Glue Ghost Clings That Peel Right Off
- 2. Glitter Ghost Clings for Extra Sparkle
- 3. Print, Tape, Trace — No Drawing Skills Needed
- 4. Garbage-Bag Bats (Yes, Really)
- 5. Holographic Bats That Throw Rainbows
- 6. Water-Activated Ghost Decals
- 7. Projector + Shower Curtain = Instant Haunted Window
- 8. Faux Stained-Glass Film (Stays Up for Years)
- 9. Paper Bat Silhouettes Across the Panes
- 10. Peelable Paint You Rip Off in One Sheet
- 11. Chalk-Pen Mural That Wipes Off With Water
- 12. White Marker Forest Scene
- 13. Let the Kids Colour the Window Gallery
- 14. Tape Up a Giant Printable Poster
- 15. Reusable Adhesive Ghost Clings
- 16. Holographic Ghost Clings
- 17. $2 Store Clings, Zero Crafting
- 18. Painter’s-Tape Projection Screen
- Conclusion
- FAQs
1. DIY Glue Ghost Clings That Peel Right Off
View this post on Instagram
Credit: @nikkis_garden_adventure
The king of renter Halloween crafts: homemade window clings from school glue. They grip glass with zero adhesive and peel off in one piece when the season ends.
- Mix: white school glue with a few drops of dish soap and food colouring.
- Pipe: the mix into ghost, bat, or pumpkin shapes on a zip-top bag.
- Dry: leave overnight until clear and firm.
- Stick: peel off the bag and press onto clean glass — no glue needed.
One batch covers a whole window. Store flat between baking paper and reuse them next year.
No adhesive means no residue, ever. This is the safest decor in this whole list for strict leases — your landlord could watch you remove them and find nothing to complain about.
2. Glitter Ghost Clings for Extra Sparkle
View this post on Instagram
Credit: @laurenely_tpt
Same peel-off magic as idea 1, with glitter and googly eyes for a craft-store look. Kids love making these, and they catch the light on a sunny window.
Use puffy paint or glitter glue straight from the bottle — no mixing needed. Outline your ghost, fill it in, press on googly eyes while wet, and dry flat for 24 hours. The glitter stays trapped inside, so it will not shed over your flat.
Stick them low where little hands (and curious cats) can reach without knocking anything over.
Black glitter glue makes the spookiest ghosts. White glitter glue looks like frost. Mix both on one window for a haunted winter feel.
3. Print, Tape, Trace — No Drawing Skills Needed
View this post on Instagram
Credit: @whimsylandwindows
Think you cannot draw? Does not matter. Print any line-art design, tape it to the outside of the glass, and trace it from the inside with a white paint marker. You get crisp, pro-looking art with zero talent required.
| You need | You do |
|---|---|
| Printed design + tape | Tape pages to the outer glass |
| White paint marker | Trace the lines from inside |
| Damp cloth | Remove the paper, admire, done |
Search “Halloween line art printable” for free designs — potion shelves, haunted houses, and spiderwebs all trace beautifully.
Tape the printout outside the window at night and trace inside with the room lights on — the lit paper glows through the glass like a lightbox.
4. Garbage-Bag Bats (Yes, Really)
View this post on Instagram
Credit: @morganzuhmakes
A black bin bag, scissors, and a spray bottle of water. That is the whole shopping list for a full window of flying bats.
- Cut bat shapes from the bag — fold it first to cut four at once.
- Spray the inside of the glass lightly with water.
- Press each bat onto the wet glass and smooth out bubbles.
- Admire — surface tension holds them up for weeks.
When Halloween ends, peel them off and toss them. Total cost: basically zero. Total damage: zero.
Cut bats in three sizes and scatter them in a rising swoop across the panes. It looks like a real swarm taking off — far better than a neat row.
5. Holographic Bats That Throw Rainbows
View this post on Instagram
Credit: @whimsical_emily
The grown-up version of bin-bag bats. Holographic bat clings stick with static — no glue — and sunlight through them throws rainbows and bat shadows across your room.
A sheet costs a few pounds online or at a craft shop. Peel, press onto clean glass, and reposition until the layout feels right. They lift off cleanly when you are done.
Pro tip: put them on the sunniest window you have. The rainbow effect only happens in direct light, and it is genuinely magical at golden hour.
South-facing windows give the strongest prism show. Stick a few clings on a mirror too — it doubles the rainbows bouncing around the room.
6. Water-Activated Ghost Decals
View this post on Instagram
Credit: @rachel_meaders
Some of the prettiest Halloween decals need nothing but water. Mist the glass, slide the decal into place, and smooth out the bubbles with a credit card. The whole window takes ten minutes.
- Ghosts and moons look best in white — they glow against dark glass at night.
- Work top to bottom so drips do not ruin finished sections.
- Re-wet to reposition — you get unlimited tries before it dries.
Removal is just as easy: soak with a wet cloth for a minute and slide them off. No scraping, no sticky patches left behind.
7. Projector + Shower Curtain = Instant Haunted Window
View this post on Instagram
Credit: @steffy
Want the most dramatic window on the street with zero crafting? Tape a white shower-curtain liner inside your window and point a small projector at it. Play a free Halloween projection video from YouTube and your window becomes a moving haunted scene.
Ghosts drift, pumpkins flicker, lightning flashes — all without touching the glass. When the night is over, untape the curtain and put the projector away. Nothing to clean, nothing to peel.
Mini projectors cost less than a big bag of decorations, and you will reuse it every Halloween (and for movie nights).
8. Faux Stained-Glass Film (Stays Up for Years)
View this post on Instagram
Credit: @thevibrantdwelling
Static-cling window film is a renter’s secret weapon. It goes on with soapy water, needs no adhesive, and peels off years later without a mark. Halloween versions come printed with haunted houses, moons, and bats.
| Why renters love it | Keep in mind |
|---|---|
| Zero adhesive, zero residue | Measure your panes before ordering |
| Adds privacy as a bonus | Smooth bubbles with a squeegee |
It also blocks the view in, which is perfect for ground-floor flats. One roll covers a whole window for less than the cost of a takeaway.
9. Paper Bat Silhouettes Across the Panes
View this post on Instagram
Credit: @diane1859
Black paper bats stuck to the inside of the glass read as perfect Halloween window silhouettes from the street — especially with a lamp glowing behind them at night.
Cut them from black card or construction paper and stick them up with small loops of painter’s tape or removable glue dots. Both come off cleanly. Arrange them flying in one direction, like they just burst out of a cave.
Landlord-proof rating: 10/10. Paper, tape, and light — nothing here can possibly damage glass or frames.
10. Peelable Paint You Rip Off in One Sheet
View this post on Instagram
Credit: @buildsbyashley
Peelable paint sounds like a prank, but it is real: paint it on glass, let it dry, then rip the whole thing off like a giant sticker. Deeply satisfying.
- Use it for: spooky messages, spiderwebs, or full-pane haunted scenes.
- Apply thick: two coats peel far better than one thin one.
- Remove: lift a corner with your nail and pull slowly — it comes away whole.
It is the closest thing to real painting a renter can get away with. Any stuck bits peel off clean with warm soapy water.
11. Chalk-Pen Mural That Wipes Off With Water
View this post on Instagram
Credit: @grannychichome_
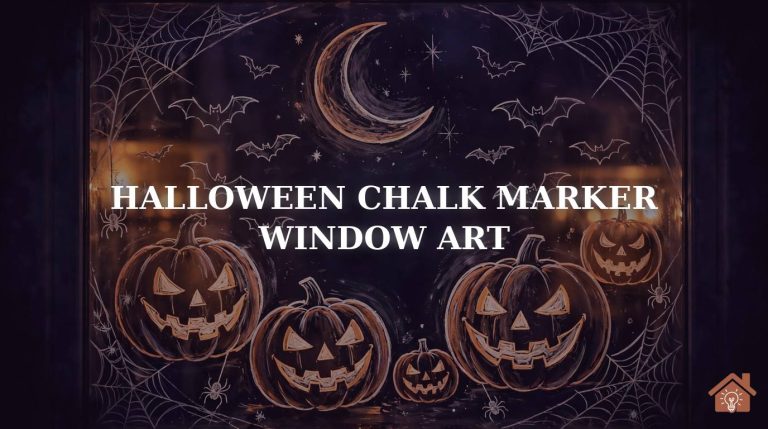
Liquid chalk pens draw like markers and erase like chalk. A full spooky mural — haunted houses, moons, spiderwebs — wipes off the glass with a damp cloth in minutes.
White shows up best on dark glass at night, which is exactly when Halloween decor matters most. Sketch lightly first, then go over your lines with confidence. Mistakes wipe away with a fingertip, so there is no pressure to be perfect.
One pen covers a surprising amount of glass. A three-pack in white, orange, and purple handles a whole apartment’s windows.
12. White Marker Forest Scene
View this post on Instagram
Credit: @ebonykatherine.studio
A whole spooky forest — twisted trees, mushrooms, owls, moons — drawn directly on a sliding glass door with a white paint marker. It looks like something from a storybook, and it all washes off.
- Start with the big shapes: tree trunks and the moon first.
- Add layers: branches, then small details like stars and bats.
- Fill gaps: dots and tiny crosses make empty space look intentional.
Sliding doors are brilliant for this because they are huge, flat, and usually the darkest glass in the flat. See more window painting ideas if this one gets you hooked.
13. Let the Kids Colour the Window Gallery
View this post on Instagram
Credit: @mytinyhumansco
Tape printable Halloween colouring sheets to the window and hand the kids chalk markers. They colour from inside, the art shows through the glass outside, and the whole thing peels off when you are done.
- Print: free Halloween colouring pages — pumpkins, cats, candy corn.
- Tape: sheets to the inner glass with painter’s tape.
- Colour: kids go wild with washable chalk markers.
It keeps little ones busy for a full afternoon, and neighbours love the handmade look. The paper protects your glass from any over-enthusiastic colouring.
14. Tape Up a Giant Printable Poster
View this post on Instagram
Credit: @jonesroots
Why decorate one pane when you can cover the whole window? Print a large poster design across multiple pages, tape the sheets together, and stick the finished poster to the inside of the glass.
Free “printable poster” sites let you turn any image into a tiled multi-page print. A Halloweentown-style street scene, a haunted mansion, or a giant moon all work brilliantly. Backlight it with a warm lamp for a glowing effect after dark.
If you want to make your own silhouettes instead, black paper cutouts give the same big impact with even less printing.
15. Reusable Adhesive Ghost Clings
View this post on Instagram
Credit: @sweetsavingsandthings
These are the store-bought upgrade to DIY clings: thick, reusable ghost decals with a gentle adhesive that releases cleanly. Peel off the backing, smooth onto glass, and reposition until it looks right.
| Good | Watch out |
|---|---|
| Reusable for years | Keep the backing sheet for storage |
| No crafting needed | Dust the glass first for best stick |
Stick the backing sheet back on after Halloween and store them flat. They will be ready to go again next October. They also work on mirrors and glass doors, so you can spread the spooky look beyond the windows.
16. Holographic Ghost Clings
View this post on Instagram
Credit: @_ashley_noel_
Ghosts, but make them shimmer. Holographic ghost clings shift colour as the light changes — silver to pink to green — so your window never looks the same twice.
They apply with static, like the holographic bats in idea 5, which means truly zero residue. Mix ghosts and bats from the same range for a matched set, or scatter a few among plain white decals for contrast.
Styling tip: these look most expensive on clean, minimal windows. Let the shimmer be the whole show — no need to add anything else.
17. $2 Store Clings, Zero Crafting
View this post on Instagram
Credit: @whimsicallywonderful
Not feeling crafty? A $2 sheet of window clings from a discount store does the whole job. Ghosts, haunted houses, pumpkins, bats — one pack covers a full window in about five minutes.
- Cheapest: discount and dollar stores, from about $2 a sheet.
- Cutest: craft shops have nicer designs for a few pounds more.
- Longest-lasting: thicker vinyl clings survive multiple Halloweens.
This is the idea to grab if Halloween snuck up on you. Buy on the way home, stick them up during one advert break, done.
18. Painter’s-Tape Projection Screen
View this post on Instagram
Credit: @jeffandlaurenshow
No shower curtain? A plain white bedsheet works just as well. Tape it inside your front window with painter’s tape — the kind made to release cleanly — trim the extra, and project any Halloween video onto it.
Painter’s tape is the renter’s best friend: it is designed to come off painted walls without marks, so glass is no challenge at all. The whole setup takes fifteen minutes and needs no damage, no nails, and no tools.
Try a crackling fireplace video for cosy vibes, or a haunted forest loop for full spooky mode.
Conclusion
Renting does not mean skipping Halloween — it just means decorating smarter. Your windows give you a huge, damage-free canvas that the whole street can enjoy, and every idea here peels, wipes, or lifts away clean.
Start with one easy win tonight: a sheet of clings, a few paper bats, or a chalk-pen doodle. Once you see how good one window looks, the rest of the flat will follow. Happy haunting — and happy deposit return.
FAQs
Will window clings damage the glass or leave marks?
No. Static-cling and water-activated decals use no adhesive at all — they hold by static or surface tension and lift off cleanly. DIY glue clings are just dried school glue, which peels away in one piece. If anything feels stuck, warm soapy water releases it.
Can my landlord stop me decorating my windows?
Most leases only restrict damage: no nails, no paint, no permanent changes. Everything in this list is temporary and removable, so it falls well within normal decorating. If your lease is unusually strict, stick to interior-side decor that does not alter the building’s exterior look.
What is the fastest way to remove everything after Halloween?
Peel off clings and decals by hand, wipe chalk and marker art with a damp cloth, and wash the glass as normal. For anything stubborn, see our guide on how to remove Halloween window paint without scratching. Ten minutes per window is plenty.
What is the cheapest renter-friendly option?
Black bin-bag bats (idea 4) cost nothing if you already own a bin bag and scissors. After that, dollar-store cling sheets at around $2 a pack are the best value — one pack dresses a whole window in minutes.
Can I do these in a dorm room?
Absolutely — dorms are ideal because the windows are usually small. Clings, chalk pens, and paper silhouettes all work on dorm glass, and everything removes cleanly before inspection day. Just check your housing rules about anything visible from outside first.