Every October you see those glowing witch and ghost windows and think: I could never make that. Too hard. Too slow. Too artsy.
Here is the truth. One bold silhouette takes about 30 minutes, a pair of scissors, and around five dollars of supplies.
No drawing skills needed. Nothing sticks to your glass forever. If you can cut along a line, you can do this tonight.
This guide shows each step with real examples. By the end, your windows will tell a spooky little story after dark.
🎃 Key Points: 30-Minute Window Silhouettes
- Total time: about 30 minutes for your first window, faster after that.
- What you need: black cardstock or poster board, scissors, painter’s tape, and a lamp.
- The golden rule: silhouettes go on the inside of the glass, light goes behind them.
- Bold beats detailed: simple shapes read from the street; fiddly details disappear.
- 100% renter-friendly: everything peels off with zero damage.
Table of Contents
- Step 1: Pick a Design That Reads From the Street
- Step 2: Gather Your Supplies
- Step 3: Make Your Template (3 Free Methods)
- Step 4: Cut It Out
- Step 5: Stick It to the Glass
- Step 6: Put Light Behind It
- Step 7: Do the Nighttime Street Check
- Step 8: Try the Zero-Cost Trash Bag Version
- Step 9: Level Up With a Cutting Machine
- Conclusion
- FAQs
Step 1: Pick a Design That Reads From the Street
View this post on Instagram
Credit: @alysssacevedo
Before you touch scissors, decide what is going in the window. The single biggest mistake beginners make is choosing something too detailed. A silhouette is read as a solid black shape against glowing glass, so it lives or dies on its outline. Big, bold, instantly recognisable shapes win: a witch on a broomstick, an arched-back cat, a flock of bats, a billowing ghost.
Think about viewing distance. Your audience is on the sidewalk, not pressed against the glass. Hold your hand at arm’s length — if the shape is still readable at that size, it will work. Skip tiny details like facial features on small figures; instead, cut eye holes out so the backlight shines through them. Two glowing eyes in a dark cat silhouette are disproportionately spooky for how easy they are.
Want inspiration? Our roundup of 21 creepy Halloween window silhouettes that glow at night has designs for every skill level, from 10-minute bats to full haunted-house scenes.
Step 2: Gather Your Supplies
View this post on Instagram
Credit: @ivyframe12
You probably own most of this already. The non-negotiable item is thick black paper — cardstock, poster board, or black craft paper. Regular printer paper is too thin: light bleeds straight through it and your crisp black shape turns into a sad grey smudge. Black is traditional, but very dark brown or navy works if that is what you have.
🧰 The 30-Minute Supply Checklist
- Black cardstock or poster board — 2–3 large sheets per window
- Scissors — sharp craft scissors; a craft knife for curves
- Painter’s tape or masking tape — sticks to glass, peels off clean
- Pencil and printer paper — for sketching or printing templates
- A lamp, fairy lights, or LED strip — the glow engine (see Step 6)
- Optional: orange tissue paper for a warm glowing backdrop
Total cost if you buy everything new: about five dollars. Most of it comes from a dollar store.
Step 3: Make Your Template (3 Free Methods)
View this post on Instagram
Credit: @hometalkupstyle
You do not need to draw. Here are three ways to get a template, easiest first:
1. Print one. Search for free Halloween silhouette templates, print at the size you want (tile across multiple pages for big designs), and cut out the printed shape to use as a stencil. This is the fastest route and the shapes are guaranteed to look good.
2. The shadow trick. This is the clever method shown above: pose a toy or cut a rough shape, shine a lamp at it so it casts a big shadow on poster board taped to the wall, then trace the shadow. You get a perfectly proportioned, large-scale silhouette with zero drawing skill. It feels like magic the first time you do it.
3. Freehand simple shapes. Bats, ghosts, and pumpkins are genuinely easy to draw freehand. Fold the paper in half and cut a symmetrical shape — instant bat. A ghost is just a rounded rectangle with a wavy bottom. Save the witch-on-broomstick for the print method.
Step 4: Cut It Out
View this post on Instagram
Credit: @jlabcreate
Trace your template onto the black cardstock and cut. A few technique notes make this much easier: use sharp scissors (dull ones chew the edges), cut with the paper turned rather than your hand for curves, and do interior detail cuts first — it is much easier to cut eye holes while the shape is still part of a big sheet than after it is flimsy and separate.
For repeated shapes like bats, stack 3–4 sheets and cut them together, or cut one bat and use it as a stencil for the rest. Vary the sizes: a flock of bats in three different sizes looks like it is flying toward you, while identical bats look stamped on. This is the step where ten extra minutes of care pays off visibly from the street.
If you are cutting a design with thin connecting bits (like a spider’s legs or a skeleton’s ribs), go slow and consider a craft knife on a cutting mat instead of scissors. Torn thin sections are the most common frustration — and they are avoidable.
Step 5: Stick It to the Glass
View this post on Instagram
Credit: @dailyoriginalvids
Always mount silhouettes on the inside of the window, facing outward. Inside mounting means zero weather damage, zero wind, and removal takes seconds. Small loops of painter’s tape or masking tape on the back of each shape hold perfectly and peel off without a trace — which is exactly what renters need. For more on damage-free decorating, see our guide to hanging Halloween window decor without tape marks.
💧 Pro Tip: The Water Method
For lightweight paper shapes, skip tape entirely: mist the glass with water from a spray bottle and press the cutout on. Surface tension holds it in place, and it peels off with zero residue. It works best on smooth glass and smaller shapes — use tape for anything large or heavy.
Plan your composition before sticking: big shapes high and centered, smaller accents clustered around them. Step back inside the room and squint — if the arrangement reads clearly from across the room, it will read from the sidewalk.
Step 6: Put Light Behind It
View this post on Instagram
Credit: @happuccinolife
This is the step that transforms paper cutouts into glowing silhouettes. The rule is simple: the light source goes behind the silhouettes (deeper into the room), pointing toward the window. A table lamp placed a foot or two behind the glass works brilliantly. Overhead ceiling light alone gives a flat, weak effect — you want a dedicated light aimed at the window.
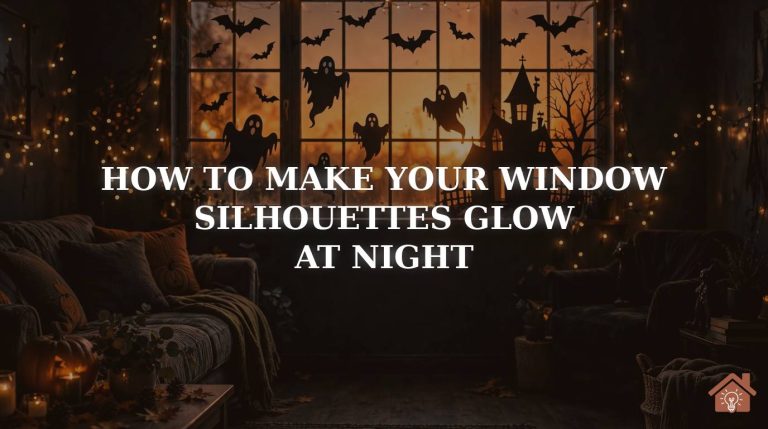
For extra drama, tape a sheet of orange or yellow tissue paper to the glass first, then mount your black shapes on top of it. The tissue diffuses the light into a warm, even, haunted glow, and your silhouettes turn pitch black against it. Battery fairy lights draped behind the scene add sparkle; a cheap orange LED strip along the windowsill gives saturated color. We go deep on all of this in how to make your window silhouettes glow at night.
Step 7: Do the Nighttime Street Check
View this post on Instagram
Credit: @craftyfun_com
Wait until dark, then walk across the street and look at your work the way everyone else will see it. This check catches three common issues: shapes that looked big indoors but vanish at distance (go bigger), light that is too dim or uneven (move the lamp closer, add a second light), and silhouettes mounted too low or off-center.
Also check for light leaks around the edges — if room light spills past your tissue-paper backdrop, tape black paper around the borders to frame the scene. A clean dark border makes the glowing center pop dramatically. Adjust, re-check, and you are done. This five-minute audit is the difference between “nice try” and “which house is that?”
Step 8: Try the Zero-Cost Trash Bag Version
View this post on Instagram
Credit: @shwetascraftland
Out of cardstock? A black trash bag works shockingly well. Draw your shapes on the bag with a marker, cut them out (cut through both layers to get two for one), and stick them up. Trash-bag plastic is thin, so double it up for opacity, and it is ideal for big, simple shapes like giant spiders or bat swarms where you need a lot of material fast.
This is also the best route for kids’ craft sessions — no sharp craft knives needed, and mistakes cost nothing. Pair it with our Halloween window painting ideas for a mixed-media window that cost almost nothing.
Step 9: Level Up With a Cutting Machine
View this post on Instagram
Credit: @k.t.gonzalez
If you own a Cricut or Silhouette, this whole project gets even faster. Cut your designs from black adhesive vinyl or cardstock in minutes — including intricate designs like haunted houses and detailed witches that would take forever by hand. Vinyl clings to glass beautifully and peels off cleanly, making it the premium renter-friendly option.
Machine cutting also unlocks multi-window scenes: cut a coordinated set (say, a witch, three bats, and a moon) and spread them across adjacent windows for a storytelling effect. If fairy lights are doing your backlighting, our fairy light ideas work just as well draped behind Halloween scenes as they do in bedrooms.
Conclusion
Thirty minutes, a pair of scissors, and black paper — that is genuinely all that stands between your windows and the best-decorated house on the street. Start with one bold design, light it from behind, and check it from the sidewalk after dark. Once you see that first glowing silhouette, you will be planning next year’s multi-window scene before Halloween is even over.
The beauty of this craft is how forgiving it is: bold shapes hide imperfect cutting, backlighting hides everything else, and the whole thing peels off in November without a trace. Now pick your design and set a timer — your spooky windows are half an hour away.
FAQs
What paper works best for window silhouettes?
Thick black cardstock or poster board. It blocks light completely, giving you crisp black shapes. Avoid regular printer paper (light bleeds through and looks grey) and construction paper (it fades). In a pinch, doubled-up black trash bags work for large simple shapes.
What tape won’t damage my windows?
Painter’s tape or masking tape on the inside of the glass — both peel off cleanly. For lightweight shapes, even a mist of water holds paper to glass with zero adhesive. Avoid packing tape or duct tape, which can leave residue, especially if left up for weeks.
How long will paper silhouettes last?
Mounted inside the glass, away from weather and direct sun, they easily last the whole Halloween season — and you can store them flat to reuse next year. Humidity is the main enemy, so avoid bathrooms or kitchens with lots of steam.
Can kids help make window silhouettes?
Absolutely — this is a great family craft. Let kids cut simple shapes like ghosts and bats with safety scissors while an adult handles detailed cuts and ladder work. Drawing the designs is half the fun for them.
Will silhouettes work on small windows?
Yes — just scale the design to the pane and keep shapes bold. One strong shape (a cat, a pumpkin face) beats a fussy scene on a small window. Check our small-space decorating ideas for more tiny-window inspiration.